

<?php
add_action('wp_print_scripts', 'inline_scripts');
function inline_scripts(){
	//Only track if not logged in or is a customer
	global $current_user;
	if ( !isset( $current_user->roles[0] ) || $current_user->roles[0] == 'customer' ) {
	?>
	<!-- Google tag (gtag.js) -->
	<script async src="https://www.googletagmanager.com/gtag/js?id=G-IDHERE"></script>
	<?php
	}
	?>
	<script>
	  window.dataLayer = window.dataLayer || [];
	  function gtag(){dataLayer.push(arguments);}
	  gtag('js', new Date());
	  gtag('config', 'G-IDHERE');
	</script>
	<?php
}Integrate Google Search Console with GA4
Understanding Organic Search data is important for any SEO or web analyst. In Universal Analytics, you could integrate your Google Search Console property with your GA property. You can now also do this for Google Analytics 4 properties!
I’ll show you how to get this set up in this step-by-step guide.
Step 1: In your GA4 admin section, open up the Search Console integration tab
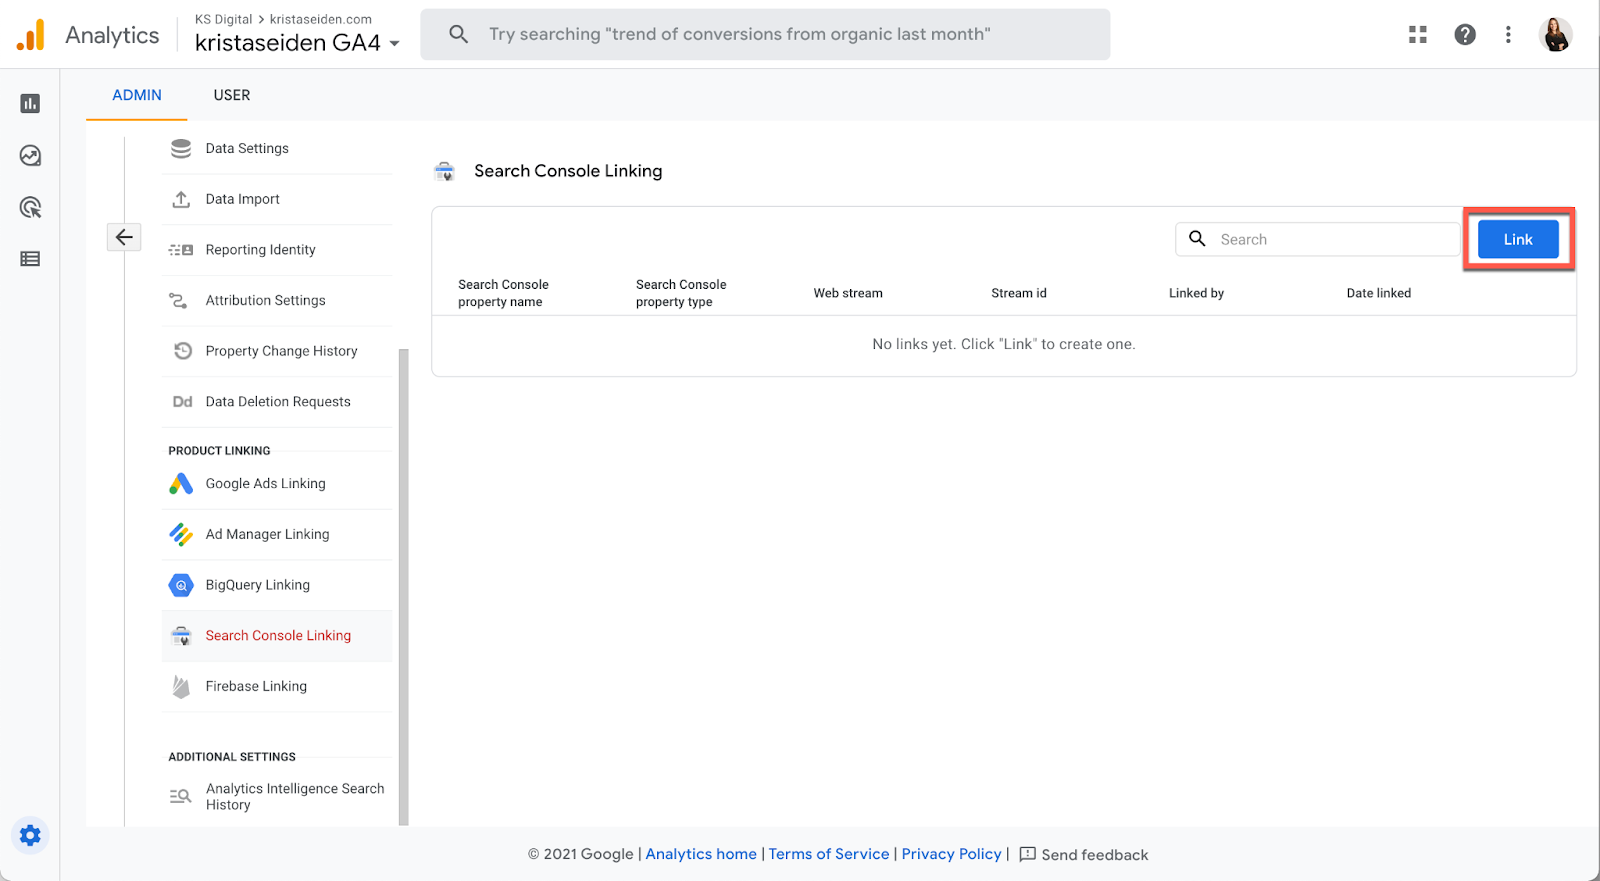
Head on over to the admin section of your Google Analytics 4 property and under the property column, scroll down and under the “Product Linking” section you’ll see a new option for “Search Console Linking”

Clicking in, you’ll be taken to an overview screen which shows your linking options. You’ll want to click the blue “Link” button in the upper right hand corner in order to start setting up a new linking.
Step 2: Set up the linking
This is a quick 3 step process, shown in the walkthrough of the screenshot below.

2.1 Choose your Search Console property. When you click “Choose accounts”, you’ll be taken to a screen which shows you all of the Search Console properties you have access to based on your account permissions.
Important: You must be an admin (‘Edit’ access) of the GA4 property and a verified site owner of the Search Console Property in order to set up the linking. This also assumes you already have a Search Console property set up for your domain, if not, you’ll need to go through the process of setting it up and verifying your domain ownership before you will be able to link Search Console to Google Analytics 4. There is an “Add a property” link towards the top left of this screen if you still need to do that step.
This linking screen will show you which Search Console properties you are a verified site owner of and can therefore link to. You’ll see that in the screenshot below, I’m choosing to link the property for kristaseiden.com. I am also a verified site owner of ksdigital.co, but as you can see, that Search Console property is already linked to a GA4 property and is therefore not available to choose.
Once you’ve selected the property you wish to link, hit confirm.

Finally, you’ll be back on the overview screen and will see the Search Console property you’ve selected listed. Now you can hit “Next” to move onto step 2.2.

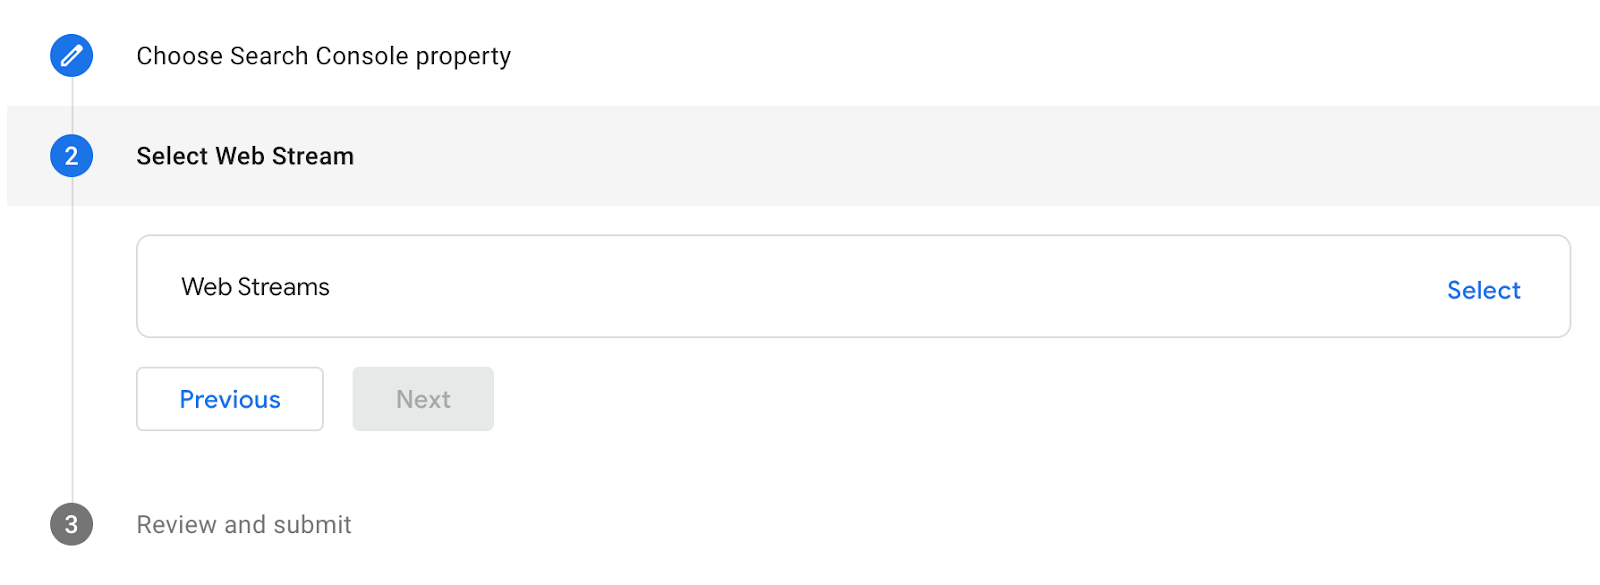
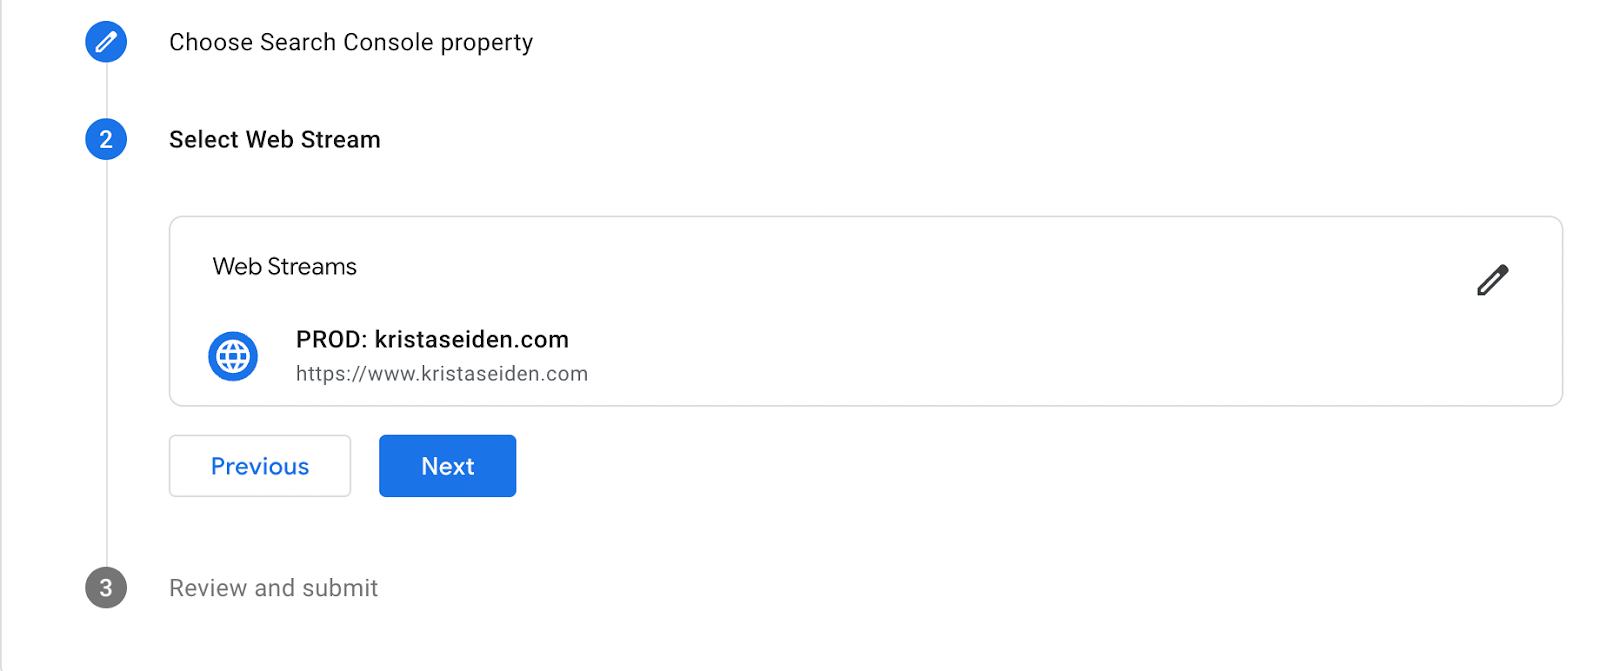
2.2 Select a Web Stream. In this step, you’ll select the GA4 web stream you want to link your Search Console property to. In this case, I only have one GA4 web stream in this property, so it’s an easy choice.
Note that it’s recommended to only have 1 web stream per property, but if you have multiple, you’ll need to choose and could end up losing out on valuable linking data since you can only link a Search Console property to 1 web stream.

Once you select the web stream you want to link, you’ll be taken back to the overview screen showing your selection. Then hit “Next” to continue.
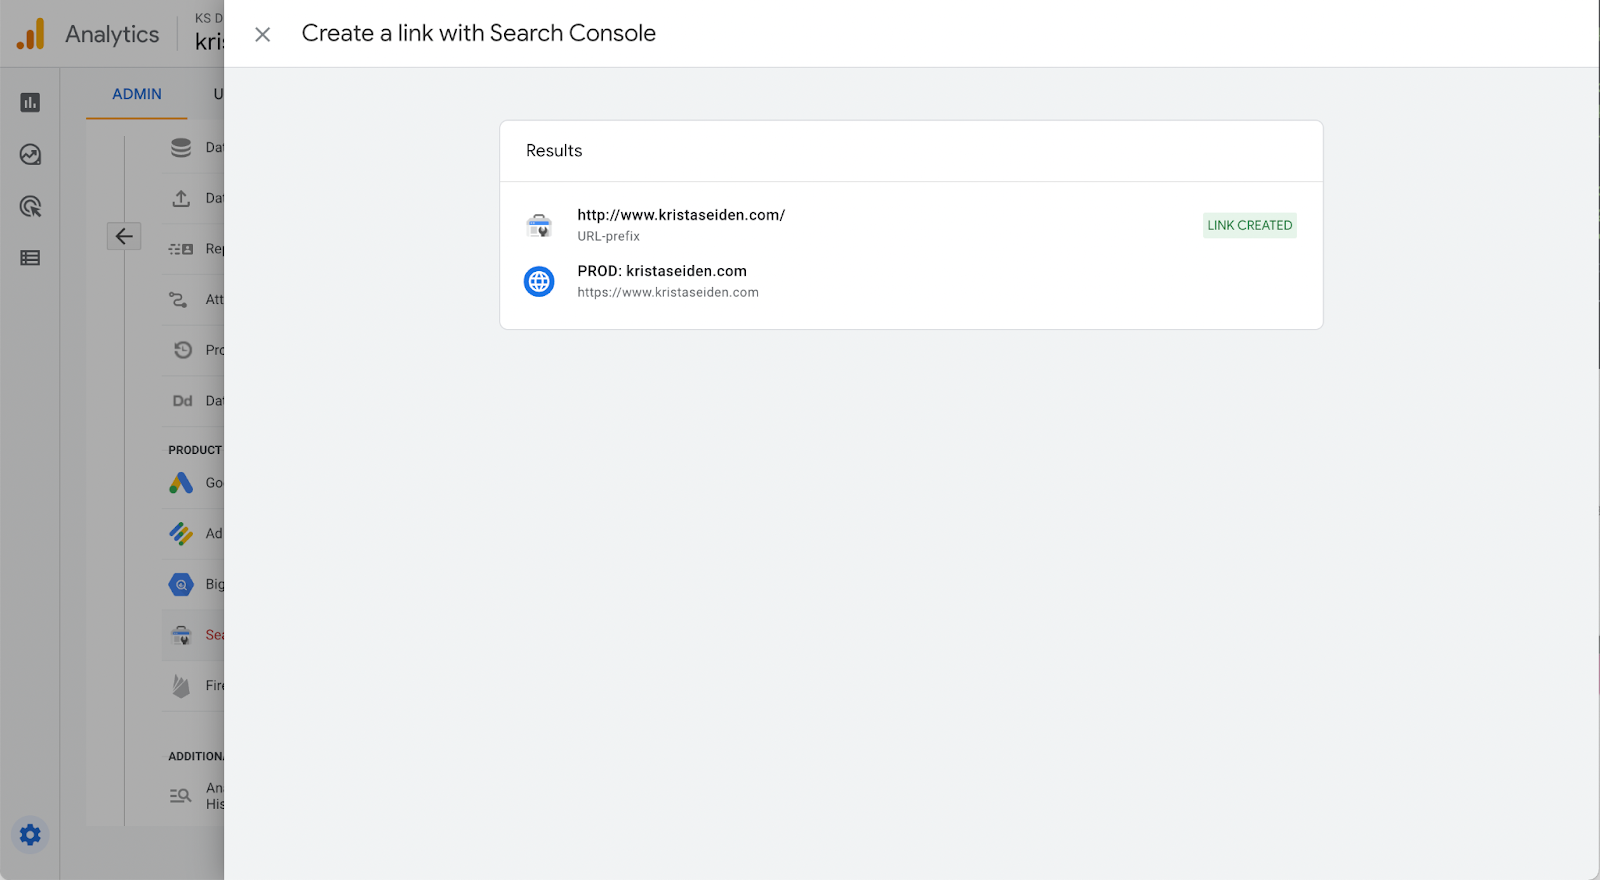
2.3 Review and submit. You’re almost done! You’ll see an overview screen which shows the selections you made in the first two steps. If these selections look correct to you, hit “Submit”

You’ll then get taken to a confirmation screen which will show you that you have successfully linked your Search Console property to your GA4 web stream. Yay!
Now that the link is created, it’s time to reap the rewards!
Step 3: Set up Reporting
Reporting is not automatically added to the left hand nav once you’ve set up this integration. Instead, once you’ve set up the integration between Search Console and GA4, you’ll see a new report collection available in the “Library” section of GA4 (note – you’ll need to be an admin on the GA4 property to see this option).

You can then click on the three vertical dots in the upper right hand corner of the Search Console report collection to edit, rename, delete, or publish the collection.

Clicking “Publish” will push the reporting collection live and show it in the left hand nav bar. Once it’s live, you’ll be able to click into the 2 reports provided and interact with them.

I’d like to go ahead and change the names of these reports to be more meaningful to me, so I can scroll down in the report list of the library section, find the reports I’m interested in, click the three dots menu, and hit rename:

I’m going to rename “Queries” to “SC: Organic Keywords” and “Google organic search traffic” to “SC: Landing Page” because these names are more meaningful to me, relating directly to what I see in these reports. I also re-ordered them in the collection interface. Now my left nav looks like this:

If we click into either of these reports, we can now see the data being collected.
“SC: Landing Page” (aka “Google organic search traffic”)

(note this data comes from www.ksdigital.co instead of www.kristaseiden.com for the purposes of showing better data)
Here you can see that I now have a robust report showing “Landing page” as the key dimension. WOO WOO GA4 finally has Landing page! All the SEOs can breathe a little easier now
This report shows a number of key metrics such as Organic google search clicks, Organic google search impressions, Organic google search click through rate, Organic google search average position, users, engaged sessions, engagement rate, avg engagement time, event count, conversions, and Ad revenue. These metrics are based on the dimension of Landing Page, but you also have the opportunity to change the primary dimension and add a secondary dimension, similar to how all other table reports work in GA4. If you don’t want to see/don’t need any of these metrics or dimensions, you can always edit this report to remove any unnecessary bulk.
“SC: Organic Keywords” (aka “Queries”)
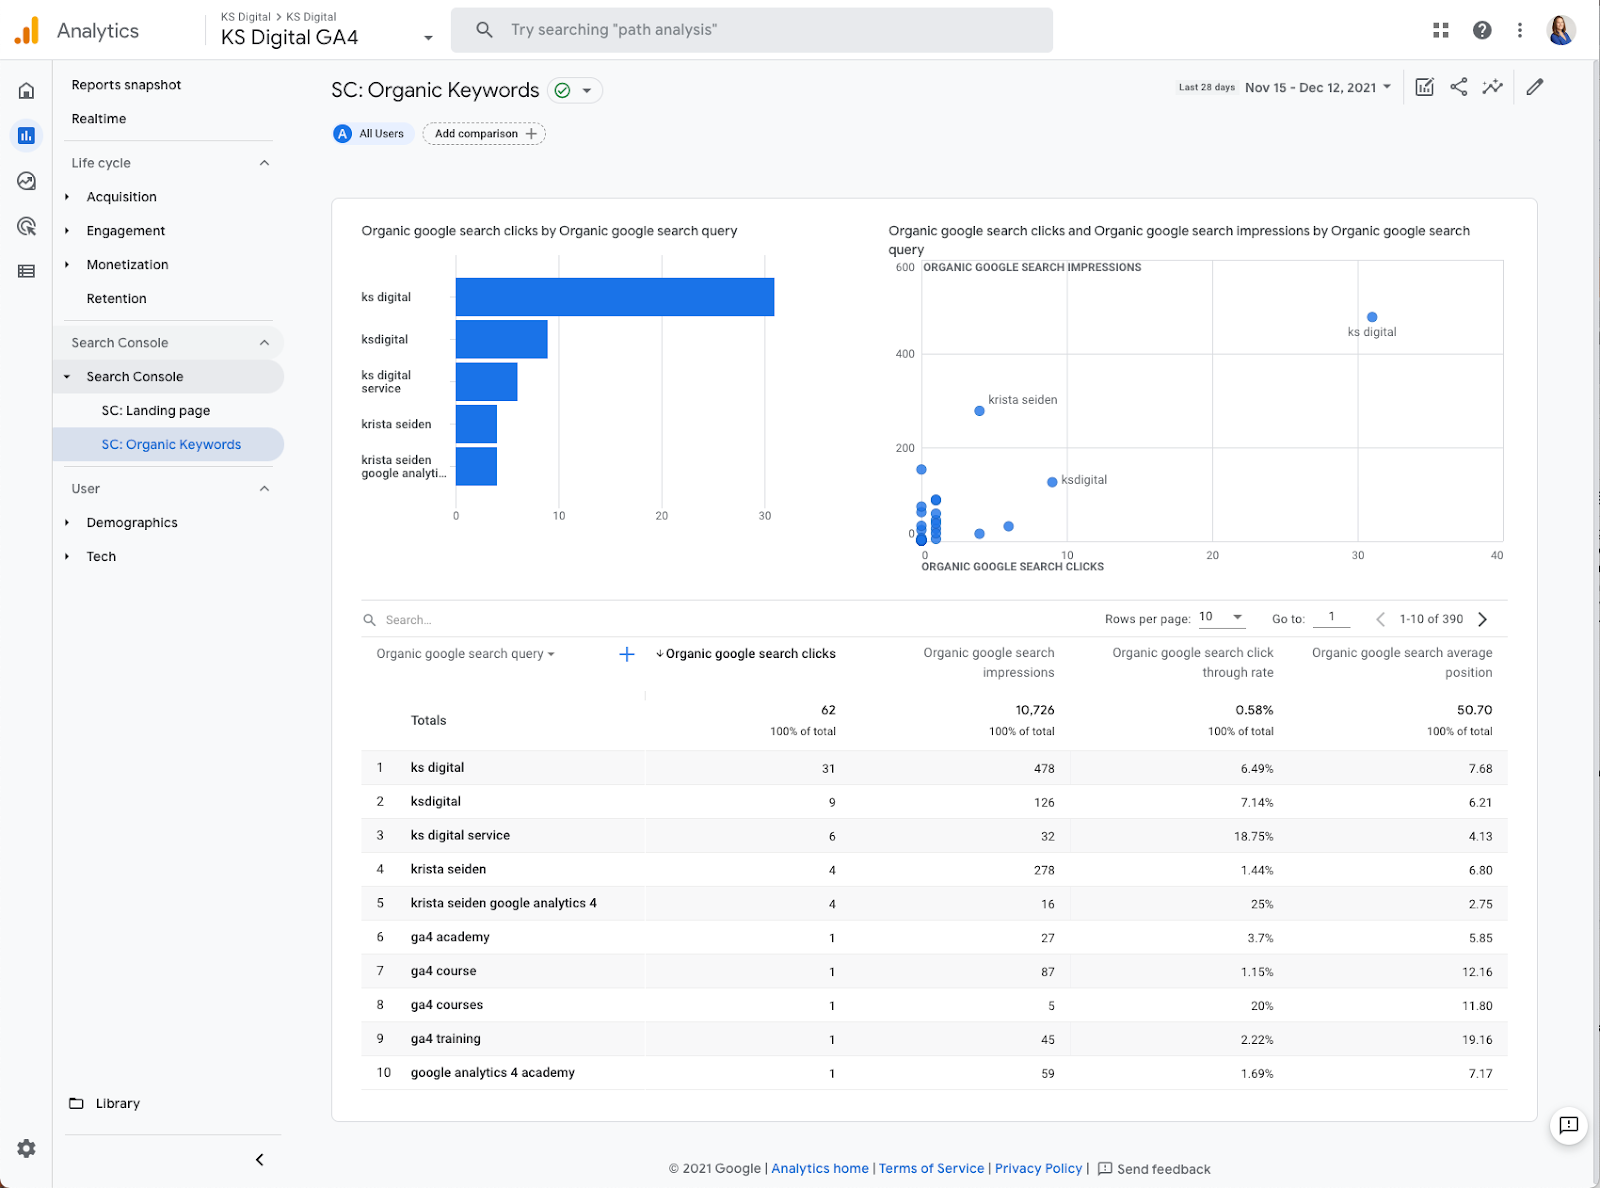
(note this data comes from www.ksdigital.co instead of www.kristaseiden.com for the purposes of showing better data)
This report shows me my organic google search queries, pulled in from Google Search console. This includes metrics such as Organic google search clicks, Organic google search impressions, Organic google search click through rate, and Organic google search average position.
Many of you may remember that prior to October 2011, Google Analytics actually collected organic search queries itself, but when Google (and soon most other search engines) encrypted search, this data almost entirely disappeared. Integrating with Search Console is the only way to see some of this data these days.
This data is GOLD because it can help you understand how users are searching for and finding you online. It can help you understand searcher intent, and can in turn help you tailor your site content to better meet the needs of people who maybe searching for you.
Keep in mind: Google Search Console keeps data only for the last 16 months, which means that reports in Google Analytics will include a maximum of 16 months of data. Search Console data is available in Search Console and in Analytics 48 hours after it is collected by Search Console.
The bottom line
There is some very valuable data that will help you make more informed decisions for your business that you can add to your GA4 property by integrating with Google Search Console. This integration is now live and is super easy to set up in just 3 simple steps. So what are you waiting for?
Want to learn even more about GA4? Head on over to https://ksdigital.co/academy/ to check out our course offerings to help you Master Google Analytics 4.
Undo Last Git Commit with reset
The easiest way to undo the last Git commit is to execute the “git reset” command with the “–soft” option that will preserve changes done to your files. You have to specify the commit to undo which is “HEAD~1” in this case.
The last commit will be removed from your Git history.
git reset --soft HEAD~1In order to undo the last commit and discard all changes in the working directory and index, execute the “git reset” command with the “–hard” option and specify the commit before HEAD (“HEAD~1”).
git reset --hard HEAD~1MySQL shutdown unexpectedly on XAMPP – Server socket created on IP: ‘::’
- Take backup all files+folder from folder mysql/data to mysql/data_old_backup
- Sometime XAMPP MySQL service stopped working, in my case reason in XAMPP control panel: “Error: MySQL shutdown unexpectedly” with the same error log
Solution:
- I have fixed the same issue, copy (+overwrite) all files+folder from xampp/mysql/backup/ into xampp/mysql/data/
- You may lost your Mysql root password after step-1, your mysql password is null now.
- Now, Copy (+overwrite) file ibdata1 from backup folder from “mysql/data_old_backup/ibdata1” to xampp/mysql/data/
(because you want to restore all your data) - Start MySQL from XAMPP control panel.
Adding Google Analytics 4 (GA4) Tracking to React App
Install the React GA4 library
npm i react-ga4On the top level initialize the tracking ID:
import React, { Suspense } from 'react';
import { BrowserRouter } from 'react-router-dom';

import Routes from './Routes';

import ReactGA from 'react-ga4';
const TRACKING_ID = "G-XXXXXXXXXX"; // OUR_TRACKING_ID
ReactGA.initialize(TRACKING_ID);

function App() {
	return (
		<Suspense fallback={<div>Loading...</div>}>
			<BrowserRouter>
				<Routes ReactGA={ReactGA} />
			</BrowserRouter>
		</Suspense>
	);
}
export default App;
Track pages on Routes.js, then start the Google Event Tracker:
import React, { useEffect, lazy } from 'react';
import {Route, Routes as Switch, useLocation} from 'react-router-dom';
import GoogleAnalyticsEventTracker from './components/GoogleAnalyticsEventTracker/GoogleAnalyticsEventTracker';

const Home = lazy(() => import('./pages/Home/Home'));
const Page1 = lazy(() => import('./pages/Page1/Page1'));
const Page2 = lazy(() => import('./pages/Page2/Page2'));
const NotFound = lazy(() => import('./pages/NotFound/NotFound'));


const Routes = props => {
	const url = useLocation();
	useEffect(() => {
		document.title = url.pathname;
		props.ReactGA.pageview(url.pathname + url.search);
	}, [url.pathname]);
	const gaEventTracker = GoogleAnalyticsEventTracker('all_custom_events');

	return (
		<Switch>
			<Route path='/' element={<Home gaEventTracker={gaEventTracker.bind(this)}/>} />
			<Route path='/page1' element={<Page1 gaEventTracker={gaEventTracker.bind(this)}/>} />

			<Route path='/page2/*' element={<Page2 gaEventTracker={gaEventTracker.bind(this)}/>} />

			<Route element={<NotFound/>} />
		</Switch>
	);
}
export default Routes;
Inside your page you’ll add an event for any click events, functions that finish, etc.
import React from 'react'

const Page1 = props => {
	const gaEventTracker = props.gaEventTracker;
    return (
	<button
		className="button"
		onClick={e => {
			gaEventTracker('click_button');
		}}
	>
		Click button
	</button>
    );
}
export default Page1Install extensions on PHP 8.0
To install PHP 8 extensions on Debian use the following command syntax:
sudo apt install php8.0-<extension>Where:
- <extension> is replaced with the actual extension name.
Some available extensions are as shown below:
$ sudo apt install php8.0-
php8.0-bcmath            php8.0-curl-dbgsym       php8.0-gmp-dbgsym        php8.0-mysql             php8.0-pspell-dbgsym     php8.0-tidy
php8.0-bcmath-dbgsym     php8.0-dba               php8.0-imap              php8.0-mysql-dbgsym      php8.0-readline          php8.0-tidy-dbgsym
php8.0-bz2               php8.0-dba-dbgsym        php8.0-imap-dbgsym       php8.0-odbc              php8.0-readline-dbgsym   php8.0-xdebug
php8.0-bz2-dbgsym        php8.0-dev               php8.0-interbase         php8.0-odbc-dbgsym       php8.0-snmp              php8.0-xml
php8.0-cgi               php8.0-enchant           php8.0-interbase-dbgsym  php8.0-opcache           php8.0-snmp-dbgsym       php8.0-xml-dbgsym
php8.0-cgi-dbgsym        php8.0-enchant-dbgsym    php8.0-intl              php8.0-opcache-dbgsym    php8.0-soap              php8.0-xsl
php8.0-cli               php8.0-fpm               php8.0-intl-dbgsym       php8.0-pgsql             php8.0-soap-dbgsym       php8.0-zip
php8.0-cli-dbgsym        php8.0-fpm-dbgsym        php8.0-ldap              php8.0-pgsql-dbgsym      php8.0-sqlite3           php8.0-zip-dbgsym
php8.0-common            php8.0-gd                php8.0-ldap-dbgsym       php8.0-phpdbg            php8.0-sqlite3-dbgsym
php8.0-common-dbgsym     php8.0-gd-dbgsym         php8.0-mbstring          php8.0-phpdbg-dbgsym     php8.0-sybase
php8.0-curl              php8.0-gmp               php8.0-mbstring-dbgsym   php8.0-pspell            php8.0-sybase-dbgsym
Example:
sudo apt install php8.0-{mysql,cli,common,imap,ldap,xml,fpm,curl,mbstring,zip}To check loaded PHP modules use the command:
$ php -mAdd Google Analytics only for customers
<?php
function site_inline_scripts() {
	global $current_user;
	$property_ga4 = "CONTAINER";
	$staging = false;
	if($_SERVER['HTTP_HOST']!="domain.com"){
		$property_ga4 = "CONTAINER2";
		$staging = true;
	}
	if ( !isset( $current_user->roles[0] ) || $current_user->roles[0] == 'customer' || $staging == true) {
		<!-- Google Tag Manager -->
		<script>(function(w,d,s,l,i){w[l]=w[l]||[];w[l].push({'gtm.start':
	new Date().getTime(),event:'gtm.js'});var f=d.getElementsByTagName(s)[0],
	j=d.createElement(s),dl=l!='dataLayer'?'&l='+l:'';j.async=true;j.src=
	'https://www.googletagmanager.com/gtm.js?id='+i+dl;f.parentNode.insertBefore(j,f);
	})(window,document,'script','dataLayer','<?php echo $property_ga4; ?>');</script>
		<!-- End Google Tag Manager -->
	}
}
add_action('wp_footer', 'site_inline_scripts', 17);Update package.json
To update whatever you added or removed to package.json run this:
npm updateError Logon failed, use ctrl+c to cancel basic credential prompt
- Tools -> Options -> Authentication
- Click “Edit” on Your Account
- Click “Refresh OAuth Token”
How to load SSH Keys to SourceTree
A lot of articles will mention loading the SSK key through the SourceTree app… don’t do this.
SourceTree will look in Pageant Key List. To load it here type “Pageant” in Windows search. Open the program. Find the ppk key to load (will need to be version 2). Then you’ll be able to push to GitHub and Bitbucket.